Before you begin, you need to know your email address and your password. If you don’t know your password, stop now and find it first.
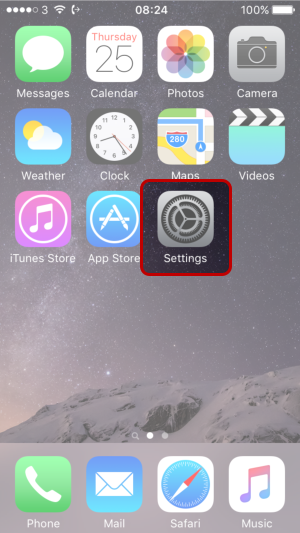
- Tap the Settings icon from your iPhone’s homescreen
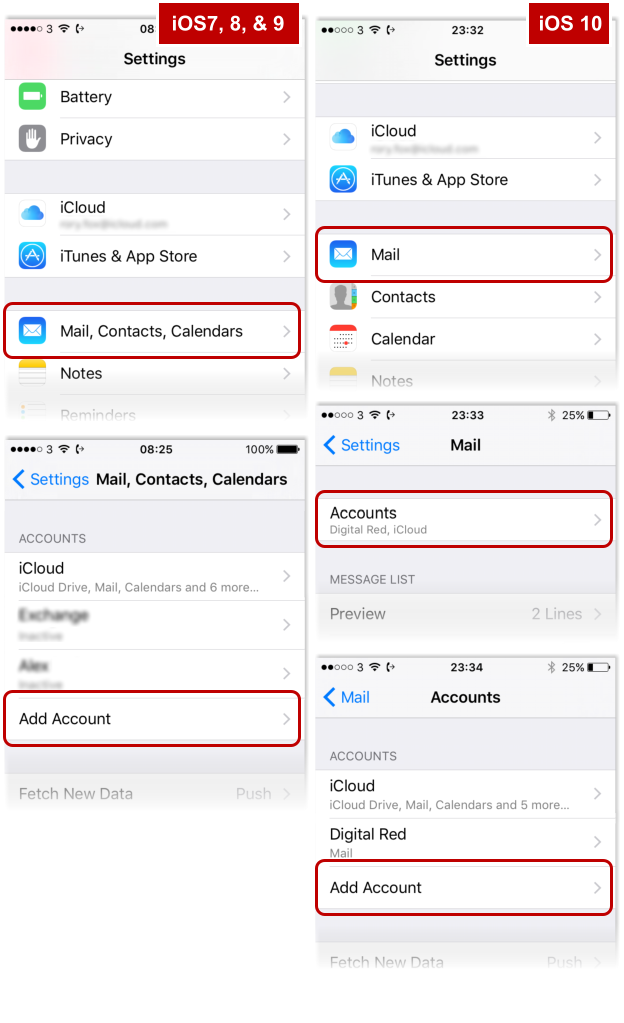
- When this page was last updated (mid September 2016), iOS 10 had just been released. The screen you see at this step will differ depending on how up-to-date your iPhone is.
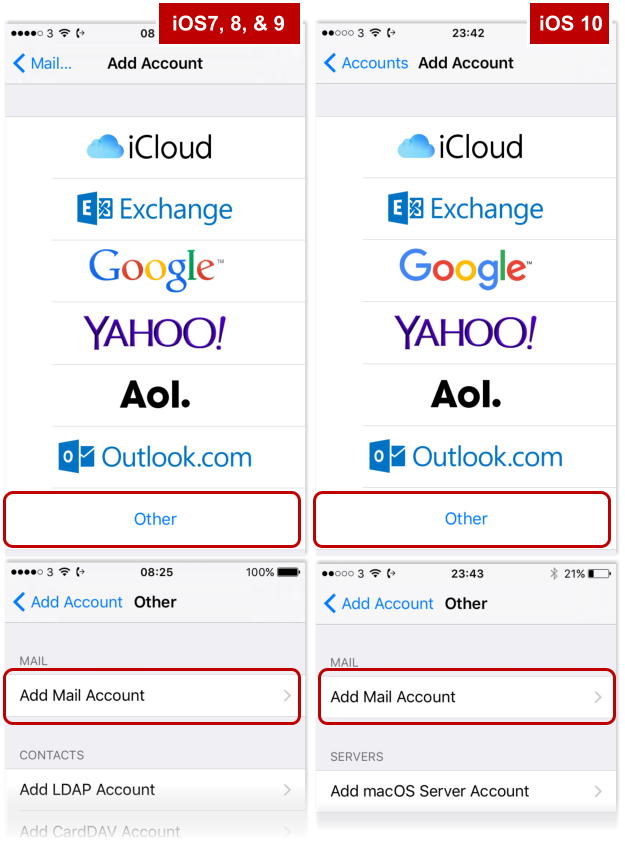
- No matter which version of iOS your phone uses, the remaining screens are the same: from the list of service providers, select Other at the bottom of the screen and then tap Add Mail Account
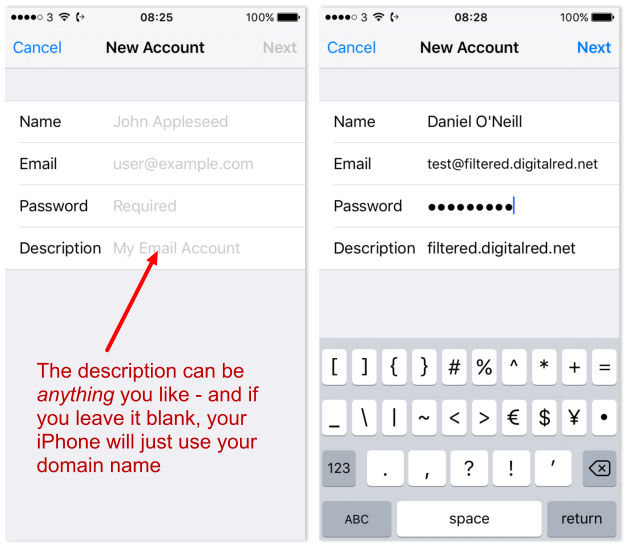
- You’ll see the blank New Account screen: just type in
- your name (with proper Title Case – it’s what people will see when you send them an email);
- your email address;
- your email password; and
- a description. (Only you will see the description – it’s only to help you identify this account from any others that you have – and you can easily change it later)
- Tap Next once you have filled in each box
- This is the really meaty screen – this is where all the settings actually are. Be ready for your phone’s greatest ever lie: when it says that the outgoing mail server details are “optional”, do not believe it!
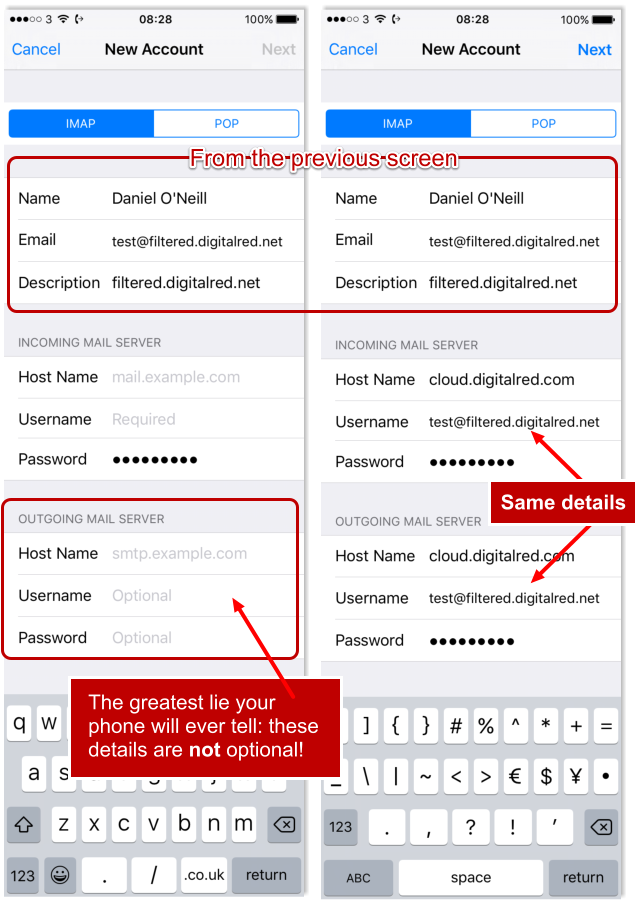
- Hostname is cloud.digitalred.com (for both the incoming and outgoing server)
- Username is your whole email address
- Password is your email account password
- Make sure that you enter the Outgoing Mail Server details (identical to the Incoming details) before you press Next
- Your iPhone will test that it can connect to your account correctly, and assuming that it can, you’ll see this screen with the green slider switch set to On for Mail. Just press Save. Congratulations: you’re finished!
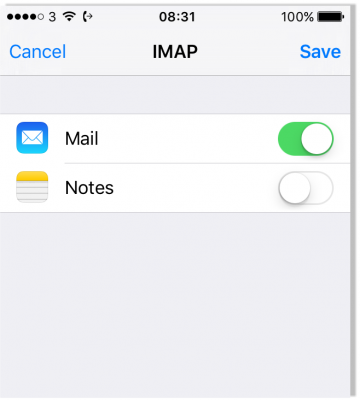
- If you don’t see this screen, you must’ve either entered something incorrectly, or your phone can’t connect to the internet

